Created 2 Create
Working in Lightroom with Adobe Portfolio and the Print Module
I Did It – This Is It!!! I started on this journey to
write for 31 days in October in 2013 and each year since I have joined a community
of bloggers at #Write31Days. Each year I’ve chosen different theme, usually
inspirational or motivational. I wanted to step outside my comfort zone and do something
a little different. This year’s theme incorporates my hobby - Photography and God’s Word; it’s
based on the scripture from Exodus 35:35
(NIV),
“He has filled them with skill to do all
kinds of work as engravers, designers, embroiderers in blue, purple and scarlet
yarn and fine linen, and weavers—all of them skilled workers and designers.”
My gifts might look
different from yours but you have one too – it might be artsy or craftsy,
communicating with others, serving others, teaching, even preaching. Whatever
your gift God wants you to use it. So, don’t be shy or selfish – share it.
Each day I featured one of the tools I use in the Adobe
Creative Cloud Programs Lightroom and Photoshop, plus a few of my favorite apps
and online design/editing programs.
We are all Create 2 Create, we each have different gifts
and we are to use those gifts to glorify God and bring joy to others. God’s
gifts and his call are irrevocable. (Romans 11:29 NIV)
We
have different gifts, according to the grace given to each of us. If your
gift is prophesying, then prophesy in accordance with your faith; if it is
serving, then serve; if it is teaching, then teach; if it is to encourage,
then give encouragement; if it is giving, then give generously; if it
is to lead, do it diligently; if it is to show mercy, do it cheerfully. (Romans 12:6-8 NIV)
So,
Christ himself gave the apostles, the prophets, the evangelists,
the pastors and teachers, to equip his people for works of service, so
that the body of Christ may be built up until we all reach
unity in the faith and in the knowledge of the Son of God and become
mature, attaining to the whole measure of the fullness of Christ. (Ephesians
4:11-13 NIV)
God’s Word is clear you are gifted and Created to Create.
So, let’s get started…
…Today’s features are Adobe Portfolio and the Print
Module in Lightroom.
AdobePortfolio allows you to create your own website to showcase your
creative works and best of all its FREE Adobe
Creative Cloud!!! It’s customizable, you can choose one of the many templates,
add your bio in the “About Me” section, add albums and content. And you’re given
a website address – all FREE!
It is very simple & easy. Choose a layout and a few
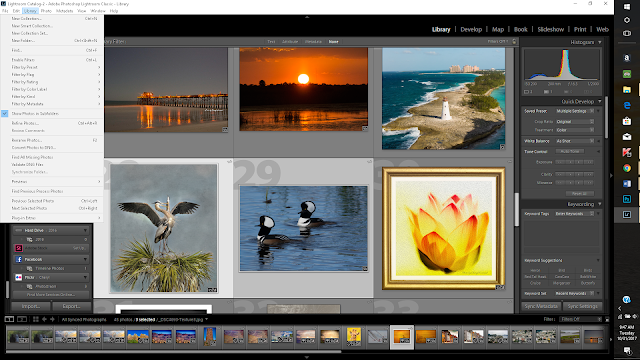
of your favorite images and add them to a “collection” or create a new collection in Lightroom. Then…
Click the + sign on the left side of the screen to add
content, this allows us to upload photos directly from one of your Lightroom Catalog.
Select the folder you want to add to the gallery and Portfolio does the rest –
it’s just that easy!
The
Print Module in Lightroom
Truthfully, this is one feature of Lightroom that I hadn’t
used until recently. The Print Module is not just for printing, it offers a way
to upload images to social media and the layouts are like collages. You can use
any of the many Lightroom Templates or create your own; you can print them, don’t
have a printer – no worries. Export your images as JPEG files that you can
share on social media! Yes, this is the feature I discovered and now use. Here’s
how…
Open Lightroom and across the top tool bar, to the far
right, between Slideshow and Web is “Print.” Click on Print to open the module.
Along the left toolbar is the list of all the Lightroom
Templates and next to “Template Browser” is a + sign where you can add your own
templates; they will appear at the bottom. You can add as many templates as you’d
like or just use or modify the ones provided. In Page Setup you’ll find all
your printers listed.
Along the right toolbar this is where you can decide the
layout for your images. Picture package is similar to the school picture
packages. Custom package is where you can customize and existing template or
create your own in “Add to a Package”. Identity Plate allows you to upload a
logo and if you desire, you can add your Watermark to each image.
In Print Hub, this is where you decide if you want to
print to a printer or save to a file or desktop to share on social media. I
chose print to “JPEG File.” You can adjust File Resolution, Print Sharpening,
JPEG Quality (you can reduce this to 80-90% for sharing), Custom File Dimensions
(you can leave this one unchecked), Color Management in most instances should
be sRGB and Print Adjustment – you can make some final tweaks to brightness and
contrast. Once you’re satisfied with all your adjusts you’re ready to Print or
Print to file. If you selected print to “JPEG File” the print button will be
grayed out. Click Print to File and choose a location to save your image. You’re
all set and its ready share!
This is what the final saved image looks like...ready to print or share.
Well this is it for this series! I hope you’ve enjoyed it
and I want to personally thank you for stopping by my blog. Here's the list of all the topics I covered in this series.
Click here for the blog link to the series. Enjoy!
Be Blessed and be a blessing!
All Photographs in this post/blog © Cheryl Howard


Comments
Post a Comment